
To access: Dispatch → Enter Trips
Click here for information on how to use a data entry window.
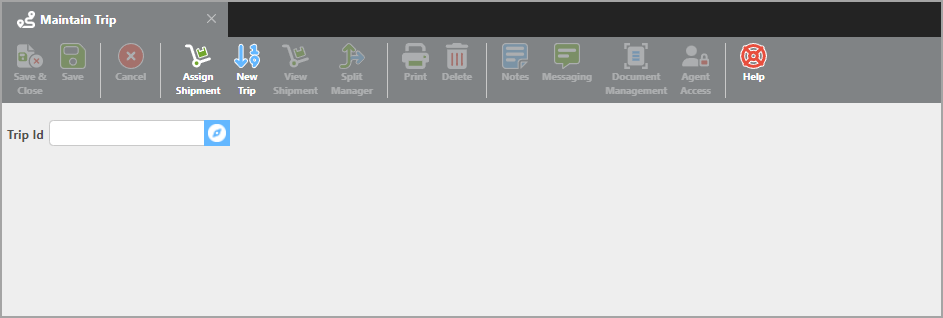
The Maintain Trips screen is where you look up existing trips and create new ones. Trips can be either Revenue or Non-Revenue. An example of a non-revenue trip would be moving a trailer from one location to another.
Trip ID and Navigation
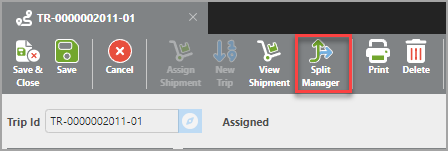
Trip ID – A unique ID of up to 25 characters. If an existing ID is entered, that trip record will be retrieved for editing. If it does not exist, a new trip record can be created. The Split Manager can be used to split a trip into multiple parts.
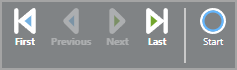
Trip Navigation Icons – Use the navigation icons on the toolbar to move to the next or previous trip, or to quickly find the last trip entered.
Check Calls
Check calls progress a trip through its stages. They can be added in two ways: manually by a dispatcher, or by accepting mobile check calls submitted by drivers.

After a trip is assigned to a driver, it is set to Assigned status. The dispatcher must enter the first check call to move the trip to Enroute status.
Manual Check Calls
To add a manual check call, click the Add button in the Check Calls section. The dispatcher will be prompted with a window showing the relevant details — the truck, trip, and stop the check call is for — along with a date/time field to enter.
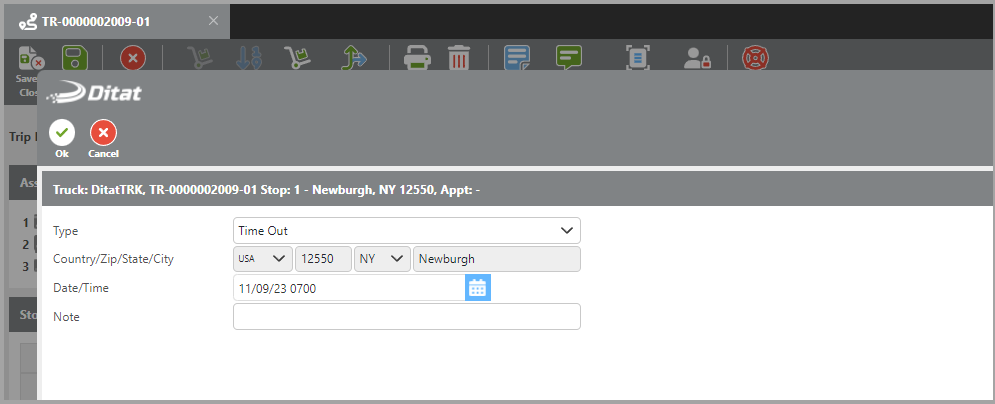
Once saved, the check call will appear under the corresponding stop.
Status Check Calls
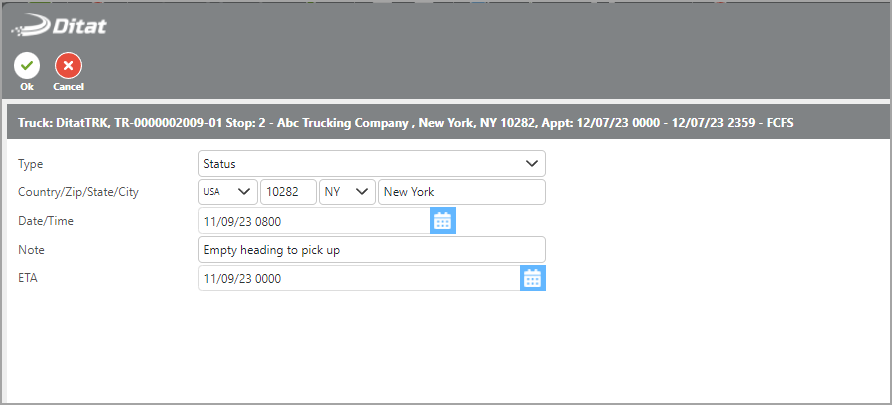
In addition to in/out times at each stop, status check calls can be added at any point during an enroute trip. To add one, change the Type to Status. This allows a timestamped note with an ETA to be recorded, updating the status of the load. Customers monitoring the Customer Portal will be able to see these status updates.
Mobile Check Calls
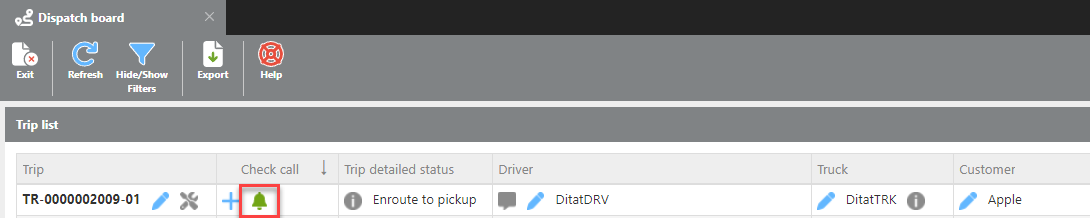
Drivers can submit check calls from their mobile devices while a trip is enroute. These appear on the Dispatch Board as a notification icon, alerting the dispatcher that a check call is pending.
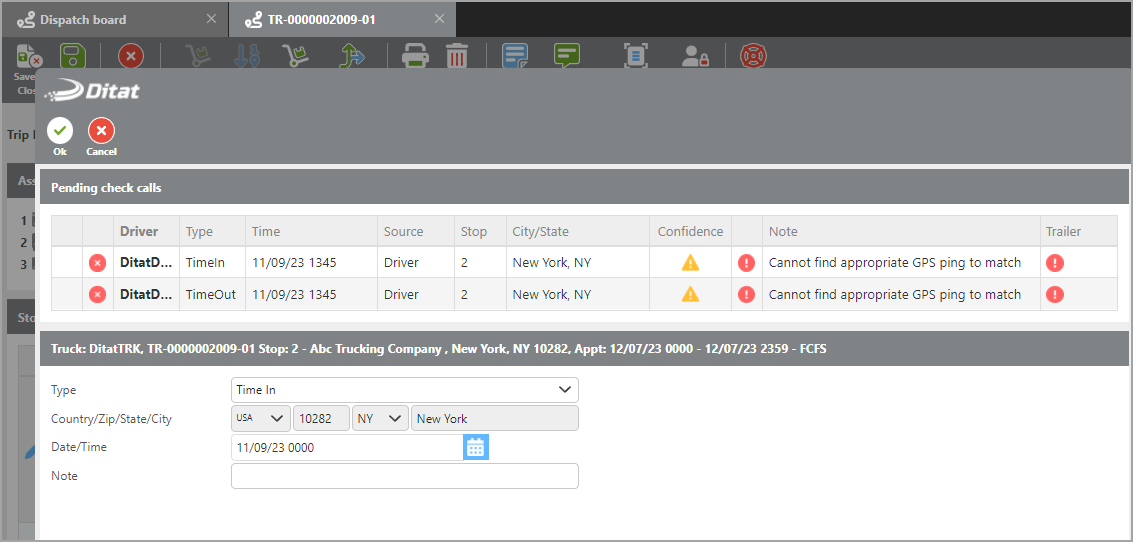
The dispatcher can accept the check call directly from the Dispatch Board or from the Maintain Trip screen. When reviewing a mobile check call, the dispatcher can add notes and late reasons if needed. The time displayed is the time the driver entered for the check call.
The dispatcher continues adding check calls until the trip is completed.
Trip Fields
|
Field |
Description |
|
Assignments |
Edit or delete truck, trailer, or driver assignments for this trip. |
|
Check Calls |
Add details about when driver stops occur, including notes confirming the driver's arrival and whether they are on time for scheduled delivery. |
|
Stops |
Edit the unloaded origin, add additional stops, or view the route on the map. |
|
Stop notes |
Enter stop-level notes for drivers or dispatchers. |
|
Calculate Pay |
Calculates what the driver(s) will be paid for the load based on their assigned pay plan. |
|
Auto Pay |
Available only when the Auto Rate & Pay module is enabled. When checked, the system will continuously recalculate pay to keep it current. When unchecked, pay must be calculated manually, as calculated pay lines will be removed from the load. |
|
Payment History Details
|
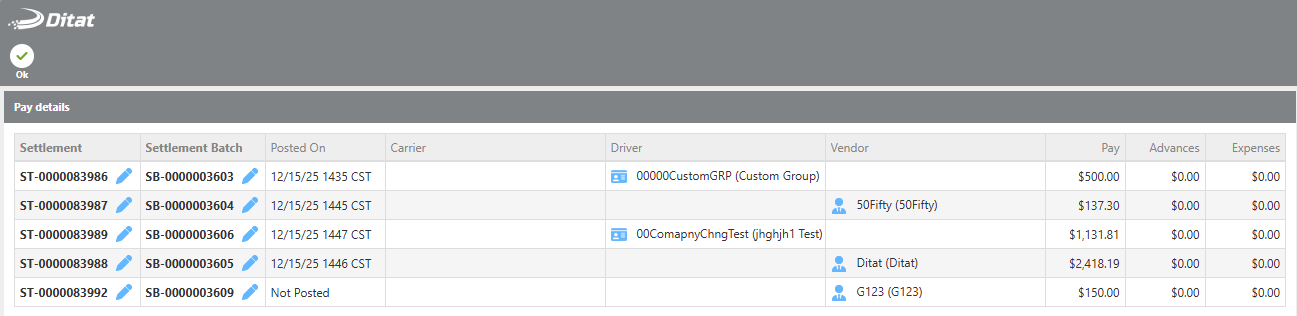
Opens a screen showing all payments made for this trip. Each payee is listed with the settlement number, batch number, posting date (or current status if not yet posted), and a breakdown of amounts paid, advanced, and expensed. |
|
Pay |
Enter driver pay lines. If a pay plan is assigned, click Calculate to auto-fill the correct rate. Additional pay lines can be added for lumpers, stops, layovers, etc. |
|
Advances |
Add any advances for the driver on this trip. These will be deducted from their pay. |
|
Reimbursements/Expenses |
Add reimbursements or expenses to be included in the driver's pay for this trip. |
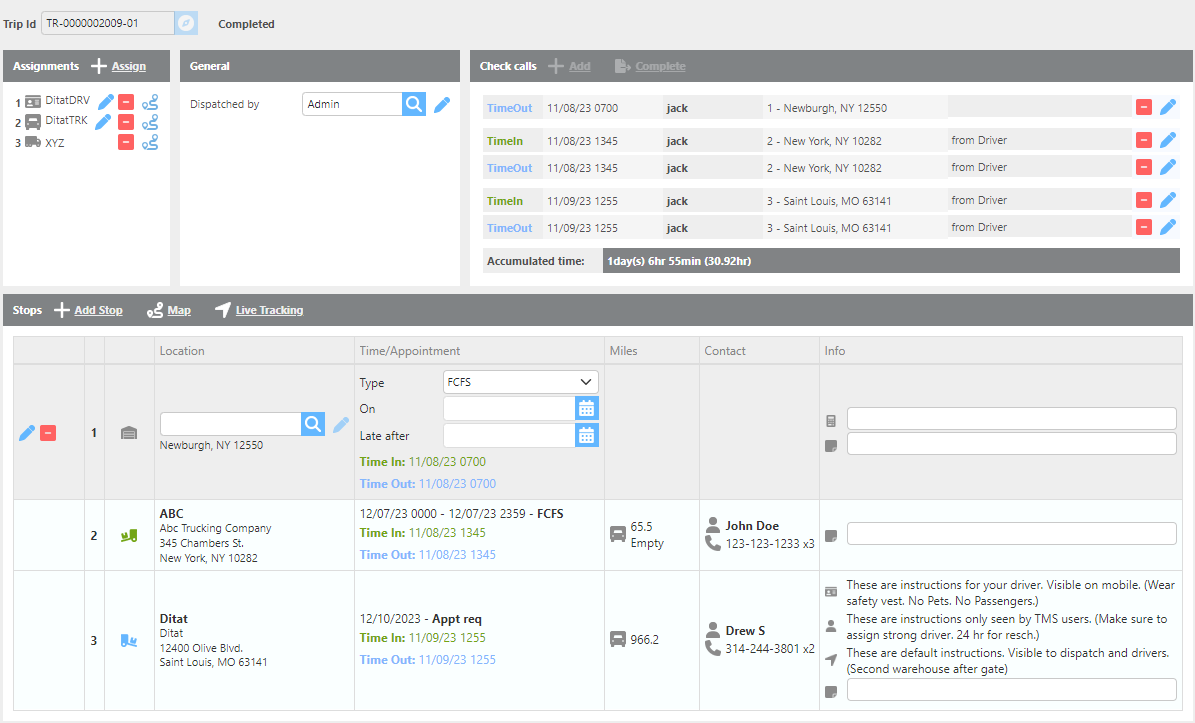
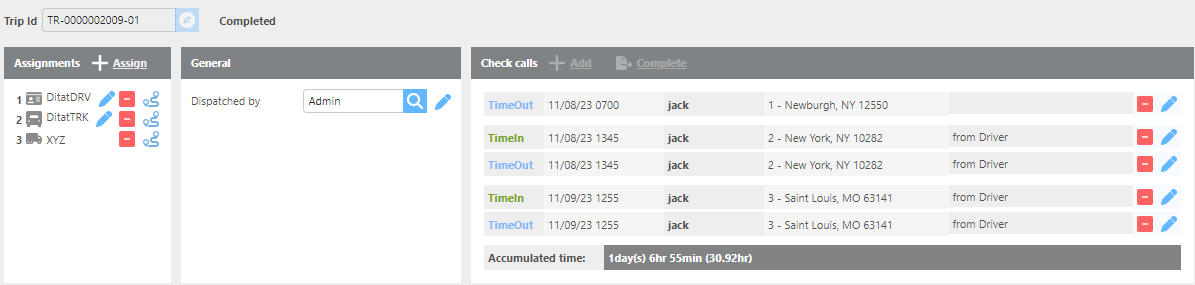
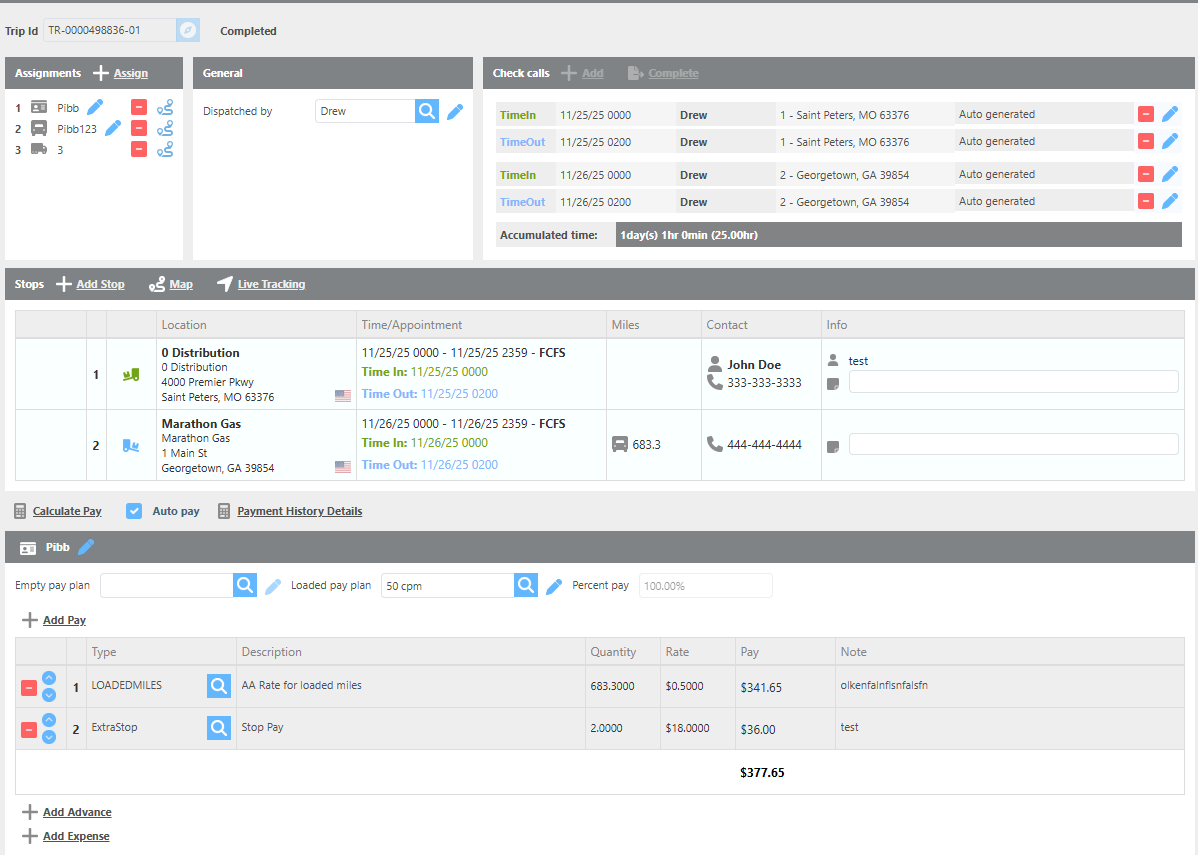
Completed Trips should look like the below:
Payment History Details
When opened, Pay Details displays the batch and settlement numbers, the posting date (or current status if not yet posted), and a breakdown of the amounts paid, advanced, and expensed per payee.
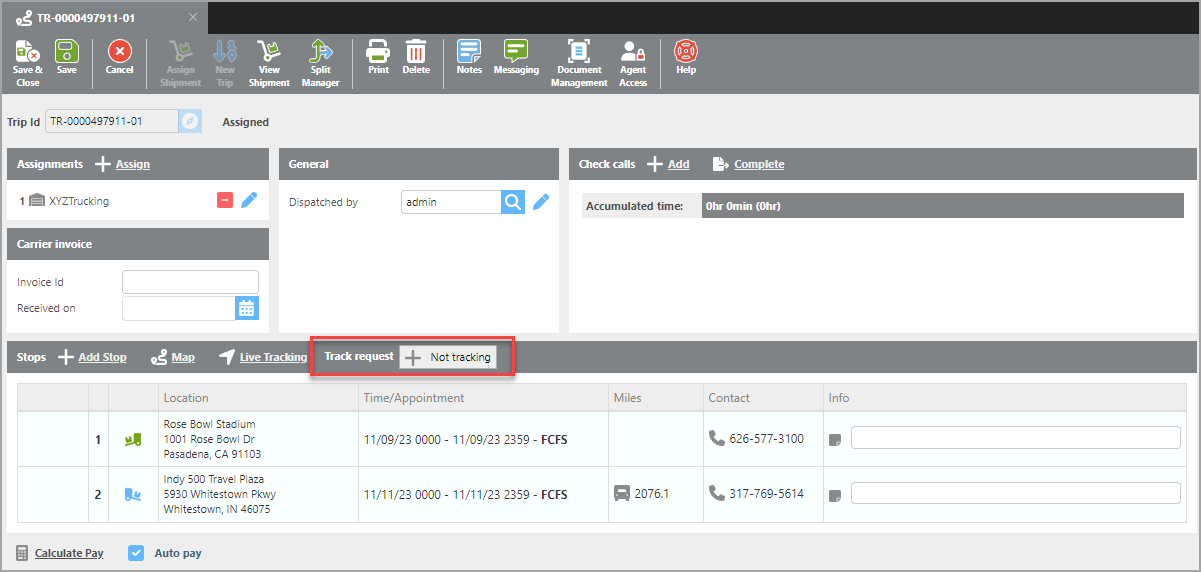
Track Request
When a carrier is assigned to a trip, users can send a MacroPoint or Trucker Tools tracking request directly from the Maintain Trip screen. This sends a tracking link to the driver's cell phone, or can track a carrier by truck or trailer number if they have ELD tracking with the chosen tracking provider. Tracking will not begin until 4 hours before the scheduled pickup appointment.
The MacroPoint or Trucker Tools tracking integrations must be enabled on your account for this option to be available.
For more information on enabling MacroPoint, contact support@ditat.com.
For MacroPoint support, contact servicedesk@descartes.com.
Live Tracking
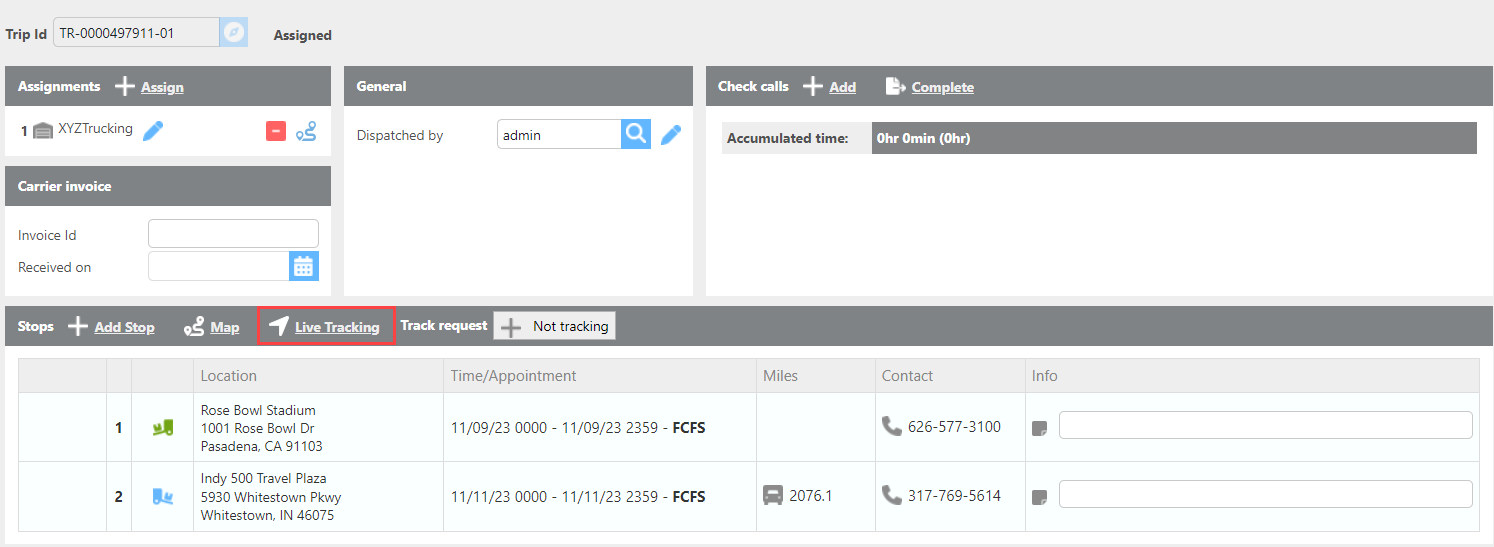
The Live Tracking feature generates a tracking link that opens in a new browser tab and mirrors the tracking data from within the trip. This link can be shared with customers so they can view live tracking for the shipment.
Split Manager
Use the Split Manager to split a shipment into multiple trip legs.
Creating a Split
-
From within the trip, click Split Manager.
-
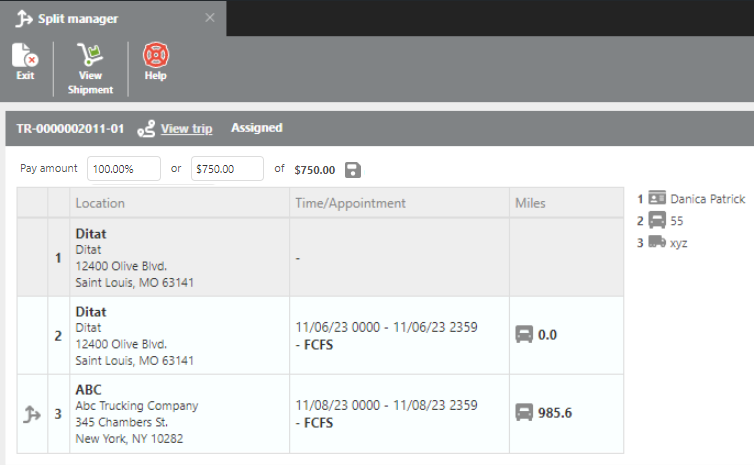
The current trip will be displayed. Select the stop before which you want to split the trip.
-
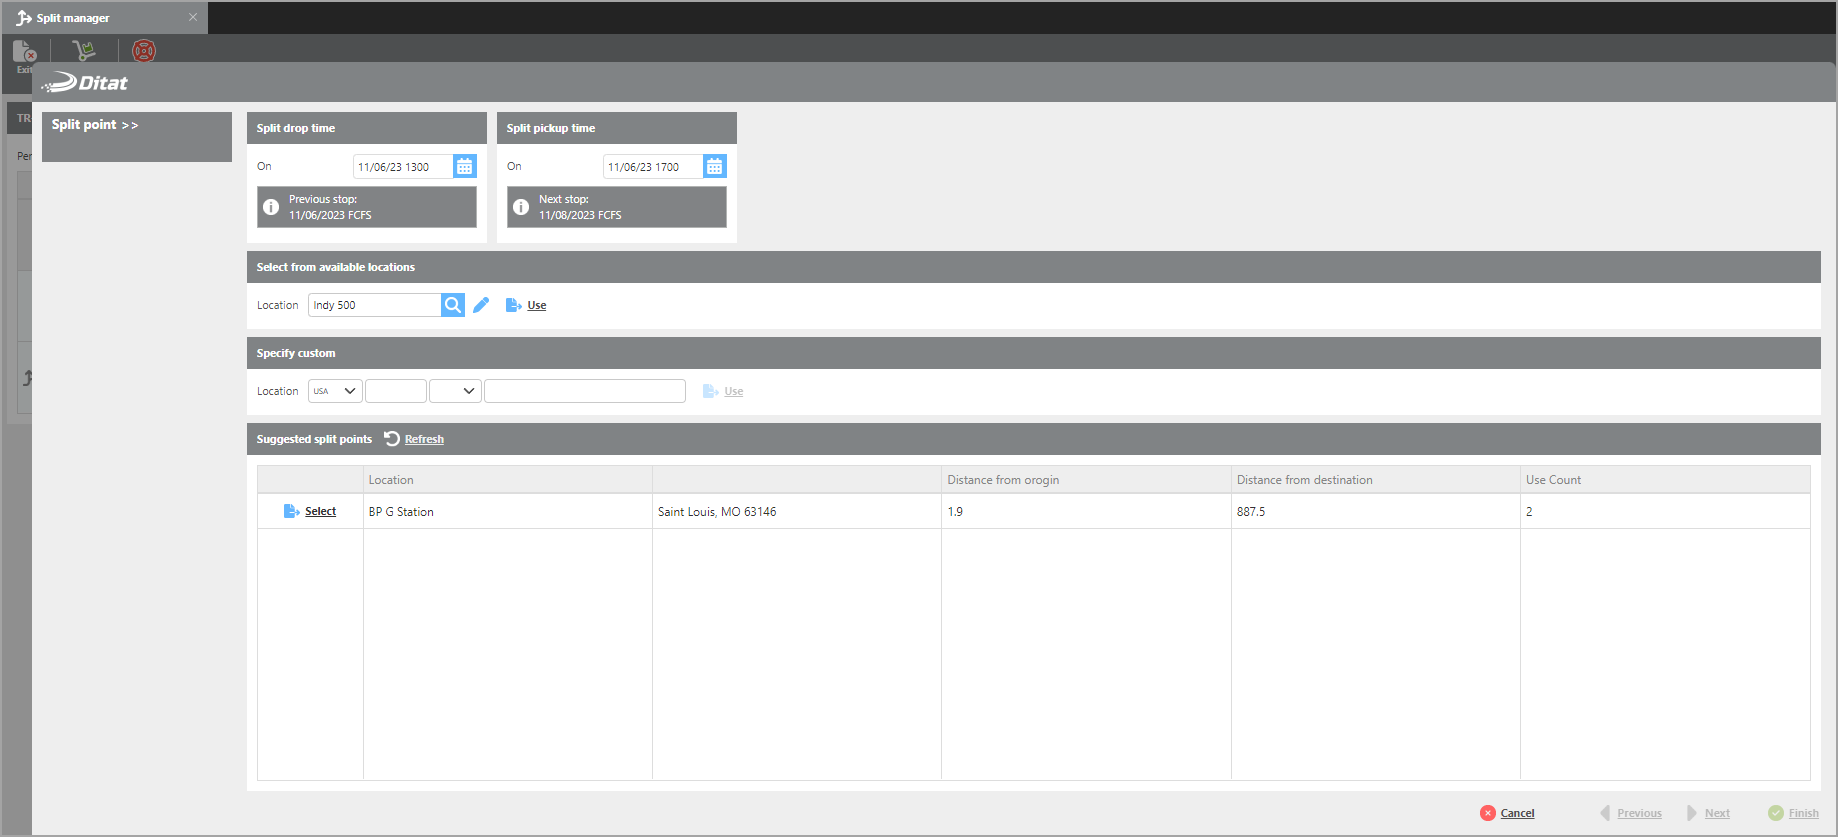
Enter the following details:
-
Date and time to drop the trailer
-
Date and time the trailer will be picked up
-
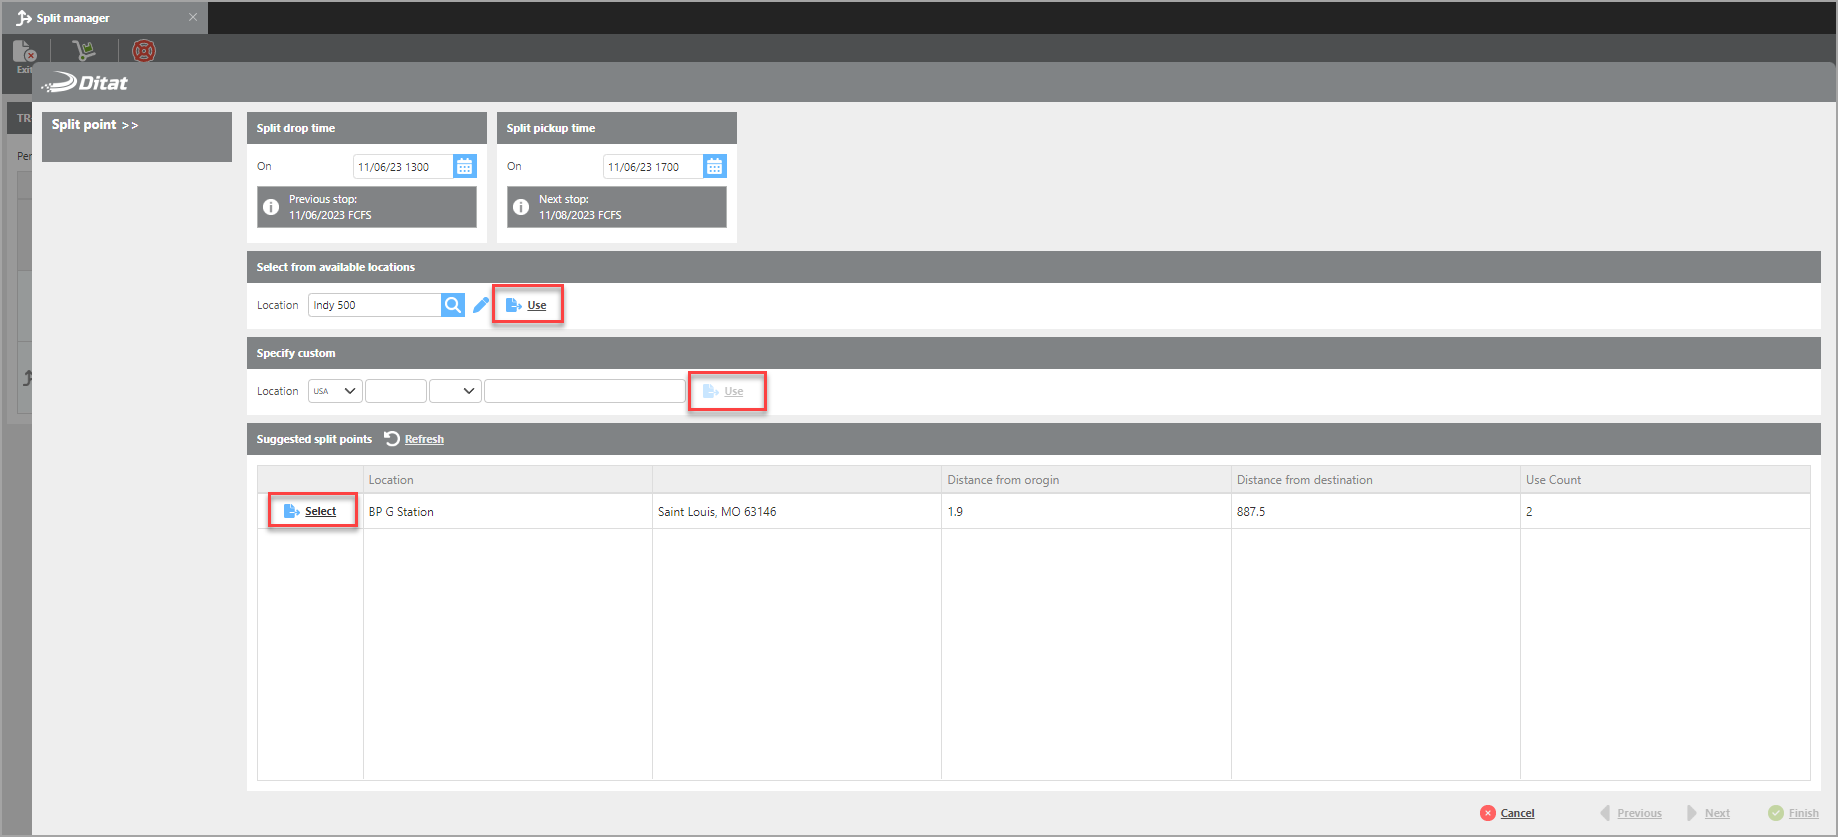
Location of the split point
-
Click Use/Select to set the split location.
-
Click Save to complete the split.
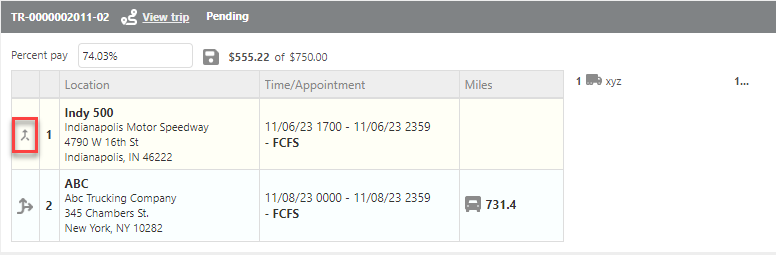
The trip will be divided into two legs, identified by the same trip number with -01 and -02 suffixes. Yellow boxes on the trip indicate the split points, and a projected pay breakdown is shown above each leg. The pay percentage for each leg can be adjusted as needed.
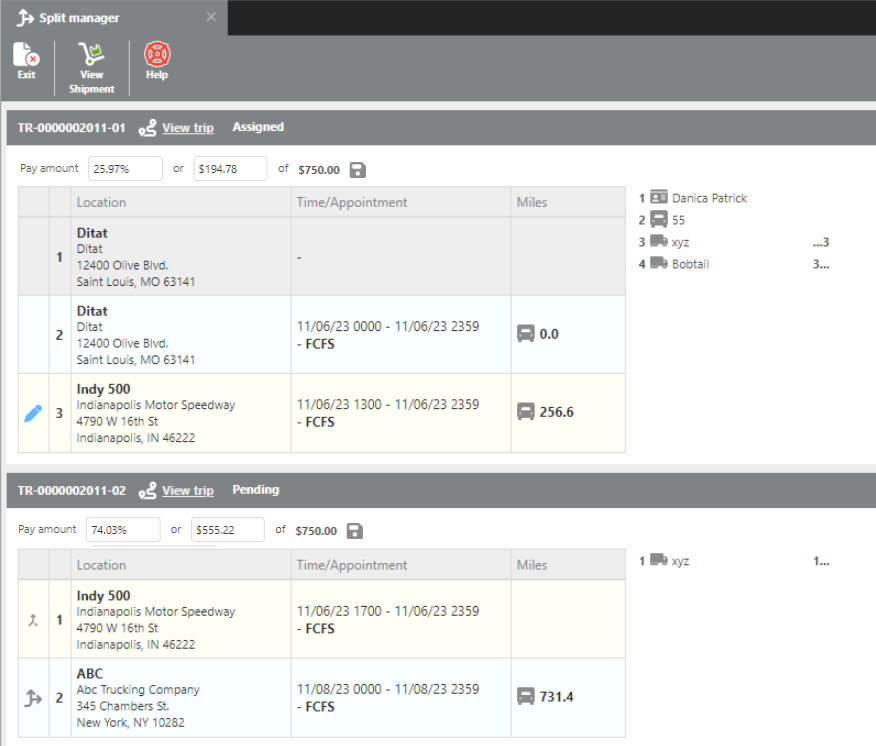
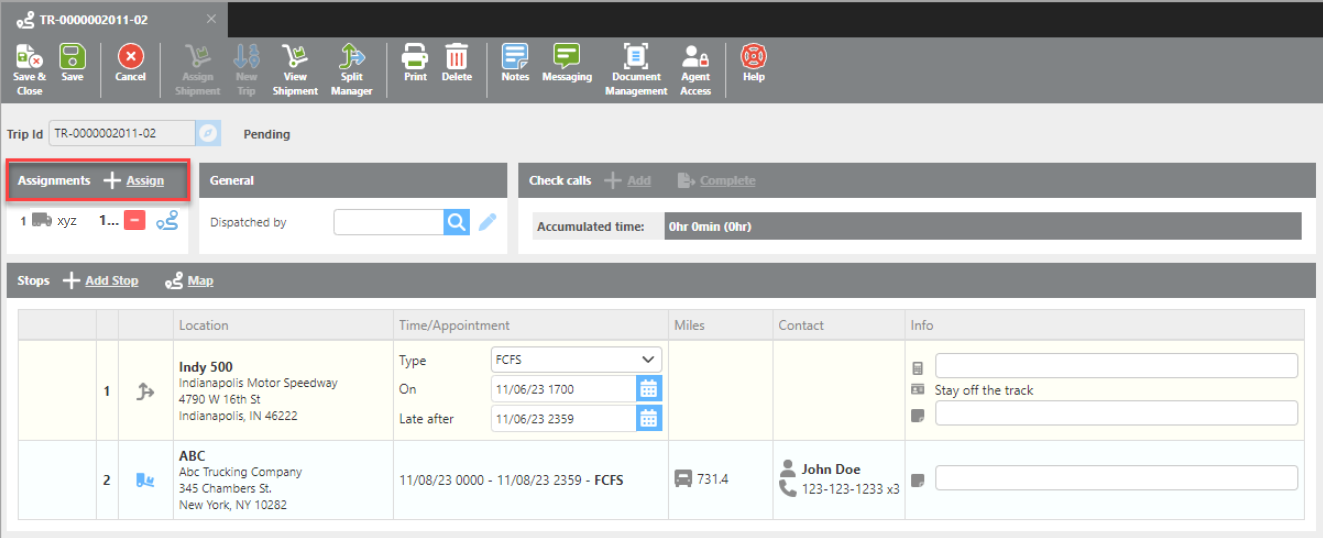
After splitting, you will need to:
-
Assign a driver to the second leg of the trip.
-
Calculate pay for both legs.
Editing a Split
To edit a split, open the Split Manager and use the red arrow to undo a leg. You can also delete the first leg of the split to restart assignments from the beginning.
Attaching Scans to Load
Adding Manual Check Calls
Adding Driver Submitted Check Calls
Dispatching Trips Video