
Creating Non-Revenue Trips
A non-revenue trip allows you to pay a driver for a trip that does not have a shipment assigned to it — for example, repositioning a trailer from one location to another.
Click here for information on how to use a data entry window.
Creating a Non-Revenue Trip
-
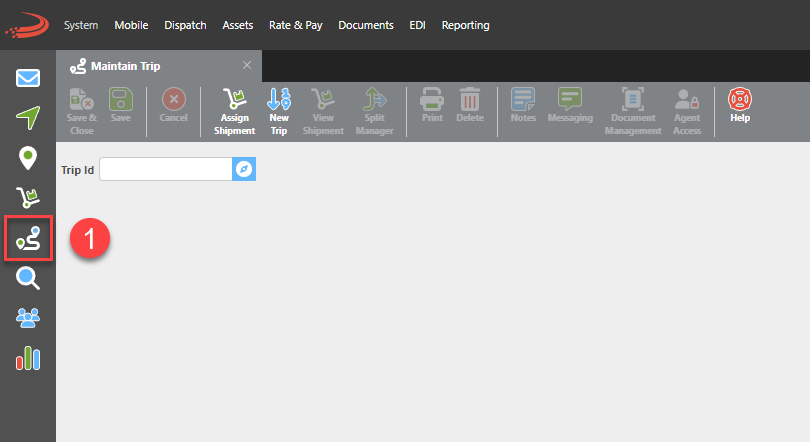
From the Quick Access bar, select Trips.
-
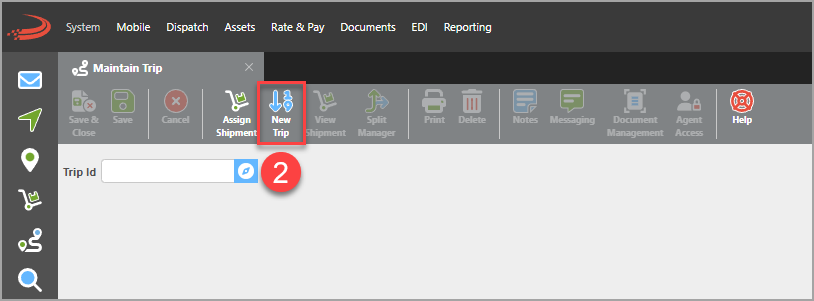
Then select New Trip
-
Add stops – Build the trip by adding pickup and delivery locations from the location directory or by entering new locations, just as you would for a standard load.
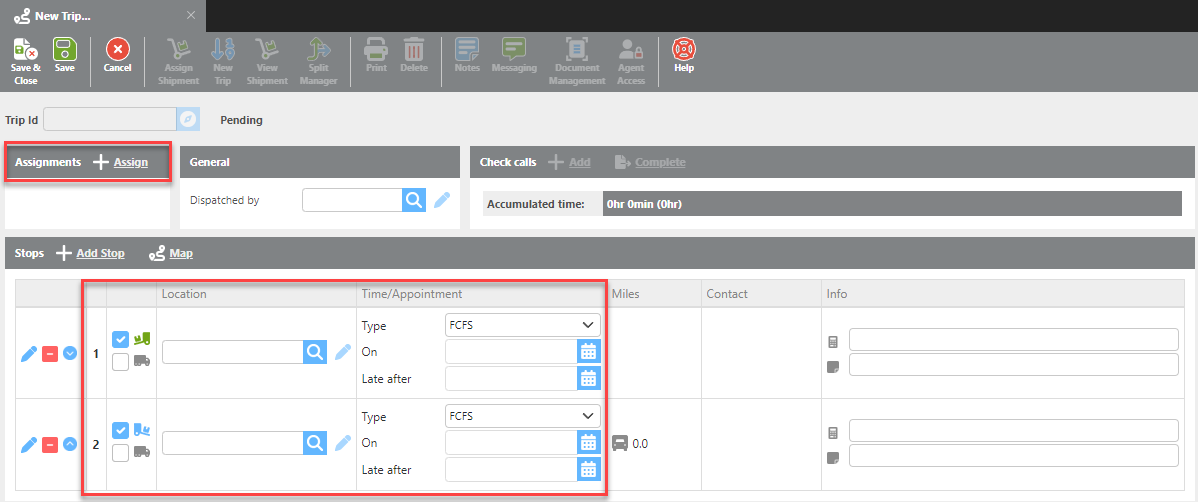
4. Add stops – Assign assets – Select the Assign tab and complete the following:
-
Select whether this trip will be handled by the Truckside or Brokerage.
-
Select the truck from the system's suggestions or by entering a specific truck ID.
-
Select the driver to assign to this trip.
-
Select the trailer and set the unloaded origin.

For help on the assignment wizard, click here.
-
Set up pay – Under the Stops section, click Calculate Pay. A pay plan will be auto-populated if one is assigned to the driver, or you can manually select or enter a pay plan. Additional pay lines for lumpers, stops, or layovers can be added using Add Pay. Advances and expenses can also be added in this section.

-
Complete the trip – Click Complete to finish the trip, or manually add check calls in the Check Calls section to progress the trip through its stages.
Entering a Non-Revenue Trip Video