
To access: Rate and Pay → Set Up Options
Follow these steps to configure the QuickBooks integration within the Ditat TMS.
Setup Steps
-
Enable the QuickBooks integration – This must be enabled by Ditat. Contact support@ditat.com to request activation.
-
Restart the Ditat TMS – After enabling the integration, restart the TMS for the change to take effect.
-
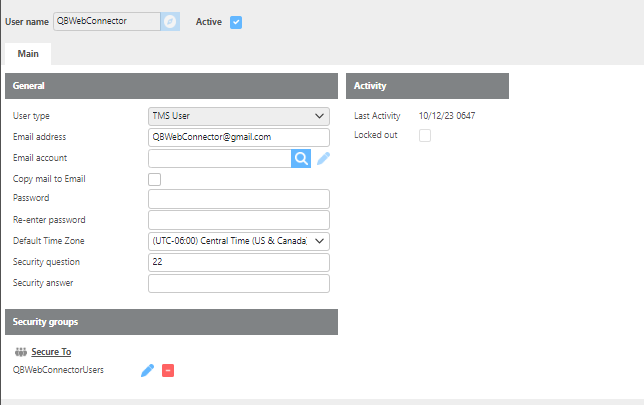
Create a Web Connector user – Create a dedicated user account for the Web Connector.Note: Make note of the password you create — you will need to enter it in the Web Connector later.
Best Practice: Name the user
QBWC[Company](e.g.,QBWCCompanyA). You will need one separate user for each company you are integrating.
-
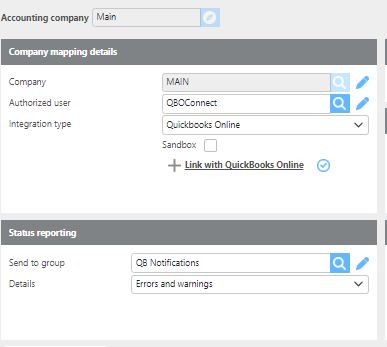
Add a QuickBooks company – Enter the new name and hit tab on your keyboard to add a new company. A setup window will appear. Complete the following:
-
Select the Ditat company to integrate.
-
Select the Web Connector user created in Step 3.
-
Enter the full file path to the QuickBooks company file, or select Link with QuickBooks Online. For QuickBooks Online, you will be redirected to sign in.
-
-
Configure status reporting notifications – The default QB Notifications group is pre-configured, but contains no users by default. Add all users who should be notified about integration events to this group. This can be done in the Maintain Users screen. Alternatively, you can assign an existing group (such as Admins or Managers) to receive these notifications.
-
Set the reporting detail level – Choose how much detail is included in integration reports:
-
Details is recommended during initial setup, as it shows all transactions and makes it easier to identify missing items.
-
Once the integration is running smoothly, this can be changed to Errors and Warnings.
-
Errors Only is not recommended, as it will suppress warnings about items that cannot sync due to missing mappings.
-
-
Save and Exit – Click Save, then Exit.
-
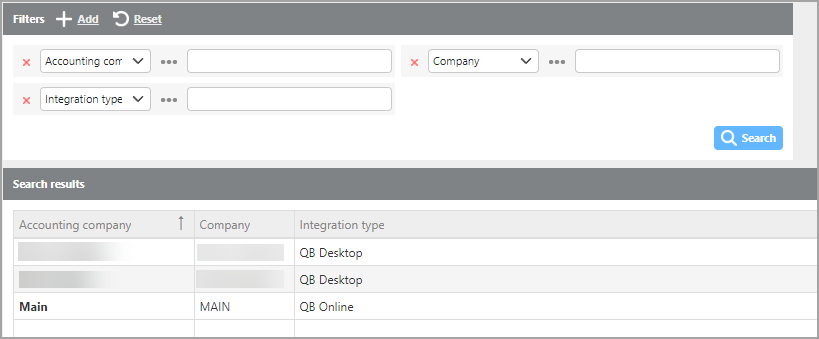
The company will be added to the company list.
-
Download the
.QBCfile – Click the Get QuickBooks Company button and save the file to your computer. This file will be needed when setting up the Web Connector. -
Repeat for additional companies – Repeat Steps 3–7 for each additional company you need to integrate. Keep the following in mind:
-
Each company requires its own dedicated user.
-
The same company cannot be mapped more than once.
-
Two Ditat companies cannot be mapped to the same QuickBooks company.
-
The Ditat TMS is now ready to accept Web Connector sessions.