
Important: This guide assumes a working knowledge of QuickBooks and covers only the steps required to complete the Ditat integration. For additional help, contact QuickBooks Support.
Setup Steps
-
(Optional) Create a dedicated QuickBooks user for the integration. See the required permissions table below for the roles this user must have.
-
Open the QuickBooks company file in Single-User mode using an Admin account. This should be the same company file specified in Step 4 of the Desktop Version Set Up.
-
Open the Web Connector – In QuickBooks, go to File → Update Web Services.
-
Add the Ditat application – In the Web Connector, go to File → Add an Application.
-
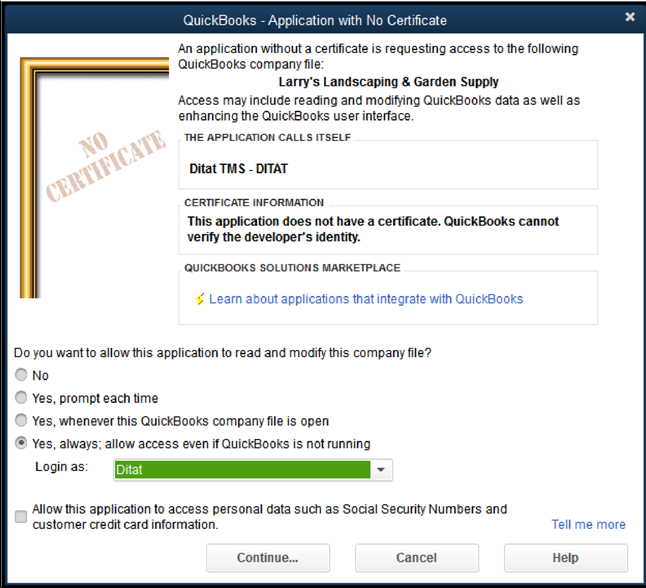
Browse to the
.QWCfile – Select the.QWCfile downloaded in Step 5 of Set Up Integration in Ditat TMS. The setup wizard will guide you through the remaining prompts. Make sure to select the correct permissions and user when prompted.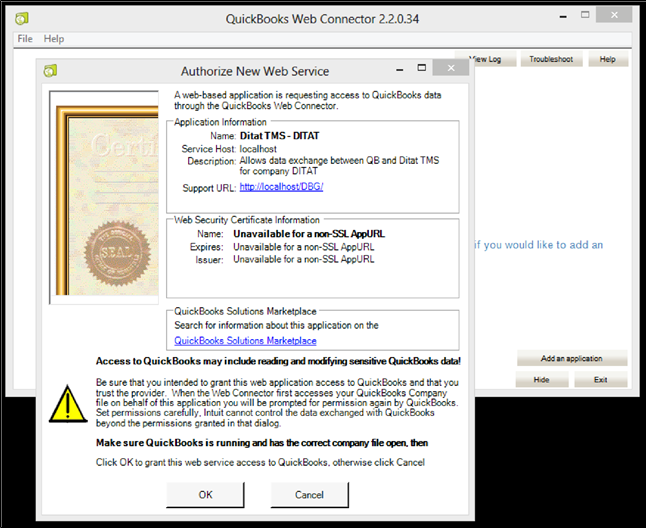
-
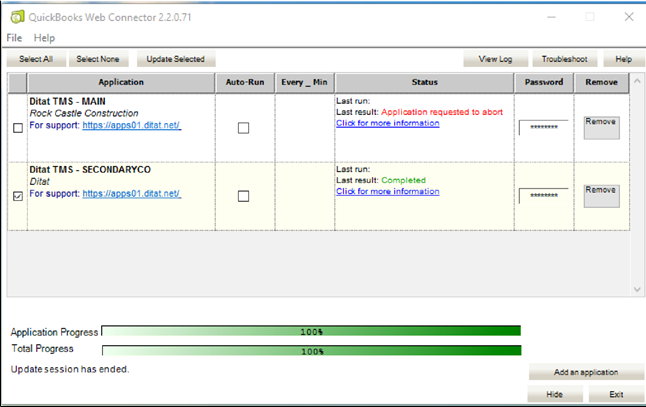
Enter the Web Connector password – Once the application has been added, enter the password you created for the Ditat TMS Web Connector user in Step 3 of Set Up Integration in Ditat TMS in the Password field.
-
Run the first sync – Check the checkbox next to the application and click Update Selected. If configured correctly, the Web Connector will connect to the Ditat TMS and perform the sync.
QuickBooks is now ready to communicate with Ditat!
Multiple Companies: Repeat Steps 4–7 for each additional company you need to integrate. Note that only one QuickBooks company file can be linked at a time — whichever company file is currently open in QuickBooks will be the one that syncs.
QuickBooks Permissions Required for the Integration User
|
Area and activities |
Access Level |
Note |
|
Centers -> Customer center |
Create/Modify entries |
Required to create and modify customers. |
|
Customers & Receivables -> Credit Memos |
Create |
Required to create credit memos. |
|
Customers & Receivables -> Invoices |
Create |
Required to create invoices.. |
|
Customers & Receivables -> Receive Payments |
Create |
Required to apply credit memos. |
|
Lists -> Item List |
View |
Required to retrieve the list of service items for mapping. |