Set Up Rate and Pay Options
To access tab: Rate & Pay -> Set Up Options
Click here for information on how to use a setup window.
Rate & Pay Options control features and functionality related to this module.
Default Rate Payment Types
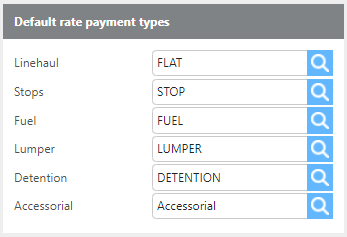
Field | Description |
Linehaul | Select the default payment type to use for Linehaul. |
Stops | Select the default payment type to use for Stops. |
Fuel | Select the default payment type to use for Fuel. |
Lumper | Select the default payment type to use for Lumper. |
Detention | Select the default payment type to use for Detention. |
Accessorial | Select the default payment type to use for Accessorial. |
Default Pay Payment Types
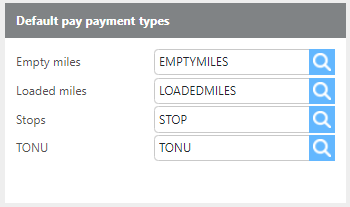
Field | Description |
Empty miles | Select the default payment type to use for Empty miles |
Loaded miles | Select the default payment type to use for Loaded miles. |
Stops | Select the default payment type to use for Stops. |
TONU | Select the default payment type to use for TONU. |
Default Companies
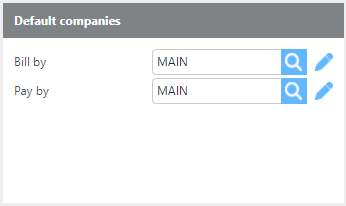
Field | Description |
Bill by | Select which of your companies will be used by default when entering the Invoicing screen. The users will have an option to switch to another company once saved. |
Pay by | Select which of your companies will be used by default when entering the Settlements screen. The users will have an option to switch to another company once saved. |
Integrations
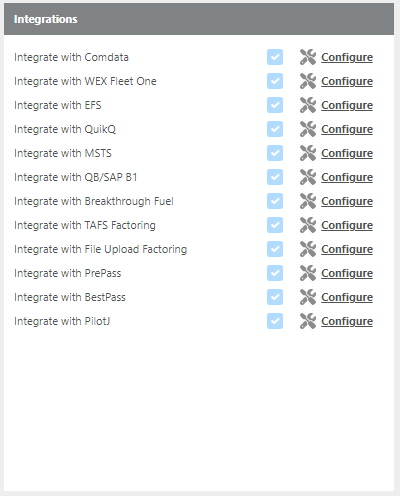
Field | Description |
Integrate with Comdata | Integration must be enabled by Ditat. If interested in details or pricing for integration please email support@ditat.com. If integration is enabled click the Configure box to set up the integration. |
Integrate with WEX Fleet One | Integration must be enabled by Ditat. If interested in details or pricing for integration please email support@ditat.com. If integration is enabled click the Configure box to set up the integration. |
Integrate with EFS | Integration must be enabled by Ditat. If interested in details or pricing for integration please email support@ditat.com. If integration is enabled click the Configure box to set up the integration. |
Integrate with Quick Q | Integration must be enabled by Ditat. If interested in details or pricing for integration please email support@ditat.com. If integration is enabled click the Configure box to set up the integration. |
Integrate with MSTS | Integration must be enabled by Ditat. If interested in details or pricing for integration please email support@ditat.com. If integration is enabled click the Configure box to set up the integration. |
Integrate with QB/SAP B1 | Integration must be enabled by Ditat. If interested in details or pricing for integration please email support@ditat.com. If integration is enabled click the Configure box to set up the integration. |
Integrate with Breakthrough Fuel | Integration must be enabled by Ditat. If interested in details or pricing for integration please email support@ditat.com. If integration is enabled click the Configure box to set up the integration. |
Integrate with TAFS Factoring | Integration must be enabled by Ditat. If interested in details or pricing for integration please email support@ditat.com. If integration is enabled click the Configure box to set up the integration. |
Integrate File Upload Factoring | Integration must be enabled by Ditat. If interested in details or pricing for integration please email support@ditat.com. If integration is enabled click the Configure box to set up the integration. |
Integrate with OTRCapital Factoring | Integration must be enabled by Ditat. If interested in details or pricing for integration please email support@ditat.com. If integration is enabled click the Configure box to set up the integration. |
Integrate with RTS Factoring | Integration must be enabled by Ditat. If interested in details or pricing for integration please email support@ditat.com. If integration is enabled click the Configure box to set up the integration. |
Integrate with Triumph Factoring | Integration must be enabled by Ditat. If interested in details or pricing for integration please email support@ditat.com. If integration is enabled click the Configure box to set up the integration. |
Integrate with PrePass | Integration must be enabled by Ditat. If interested in details or pricing for integration please email support@ditat.com. If integration is enabled click the Configure box to set up the integration. |
Integrate with Best Pass | Integration must be enabled by Ditat. If interested in details or pricing for integration please email support@ditat.com. If integration is enabled click the Configure box to set up the integration. |
Integrate with PilotJ | Integration must be enabled by Ditat. If interested in details or pricing for integration please email support@ditat.com. If integration is enabled click the Configure box to set up the integration. |
Auto Rate and Pay
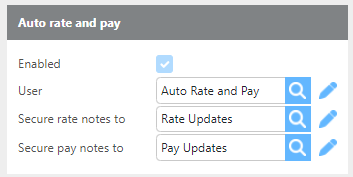
Field | Description |
Enabled | Integration must be enabled by Ditat. If interested in details or pricing for integration please email support@ditat.com. |
User | This should be the "AutoRatePay" user that will log in and make the changes to rate and pay for all loads. |
Secure rate notes to | This should be a user group created that will have access to see the notes of updates that are done by the "AutoRatePay" user for rate updates on shipments. |
Secure pay notes to | This should be a user group created that will have access to see the notes of updates that are done by the "AutoRatePay" user for pay updates in trips. |
Auto Fuel Price Updater
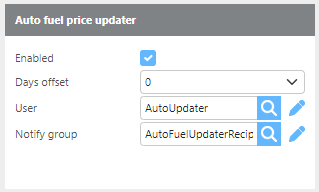
Field | Description |
Enabled | If enabled the system will attempt to download fuel prices at 6 pm on Monday and again on Tuesdays for the upcoming week's fuel. |
Days offset | Select if the fuel prices should be offset by 0 so prices would run from Monday to Sunday or offset by 1 and prices would run from Tuesday to Monday. |
User | Add the Fuel Price Updater user here, this will be the user that is generated to update fuel prices. |
Notify group | Enter the group of users who will receive updates when the Fuel price updater runs, will get a message that prices were updated or that price updates failed. |
Other
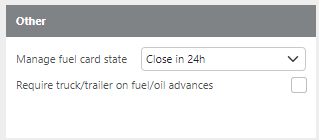
Field | Description |
Manage fuel card state | Here you can set how Ditat will manage Auto closing fuel cards if you have the 2nd tier integration. |
Require Truck/Trailer on Fuel/Oil Advances | If this box is checked you will not be able to Post an Advance that has fuel or oil without being assigned to a Truck or Trailer |
Manage Fuel Card State
The Manage Fuel Card state option will control how Ditat will control Fuel Cards. There are options for:
Don't Manage- Ditat will not change the status of this card without a user making the change.
Close when not assigned - Ditat will auto close the Fuel card if it is assigned to a driver that is not currently assigned to a trip.
Close in 1hr - Ditat will auto close the Fuel card one hour after the driver completes his load if that driver is not currently assigned to another trip.
Close in 4hr - Ditat will auto close the Fuel card 4 hours after the driver completes his load if that driver is not currently assigned to another trip.
Close in 6hr - Ditat will auto close the Fuel card 6 hours after the driver completes his load if that driver is not currently assigned to another trip.
Close in 12hr - Ditat will auto close the Fuel card 12 hours after the driver completes his load if that driver is not currently assigned to another trip.
Close in 24hr - Ditat will auto close the Fuel card 24 hours after the driver completes his load if that driver is not currently assigned to another trip.
Accounting Id prefix & size
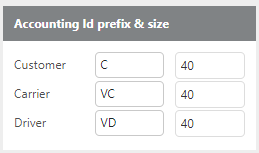
Field | Description |
Customer | Ditat recommends using C as the Customer Prefix and leaving the size at 40 unless integrating with SAP when the Size should be 15. |
Carrier | Ditat recommends using VC as the Carrier Prefix and leaving the size at 40 unless integrating with SAP when the Size should be 15. |
Driver | Ditat recommends using VD as the Driver Prefix and leaving the size at 40 unless integrating with SAP when the Size should be 15. |
Accounting Integrations
Since SAP and QuickBooks do not handle vendors and customers having the same Id's Prefixes are a good way to prevent duplication. Ditat recommends keeping Prefixes in place to prevent issues in the future. Size Requirements SAP will not allow more than 15 characters in an Id and QB caps their Id at 40 characters.
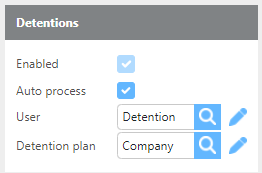
Detentions
Field | Description |
Enabled | This check box indicates whether the feature is enabled on your account. |
Auto process | Check this box if you would like Detention to be auto-processed. |
User | The Feature specific User “Detention” should be entered here. |
Detention plan | Enter your company wide detention policy here. You can enter customer specific plans on the customer profile if needed that will override this plan. |
Auto-Detention
For more information about this feature please reach out to Sales@ditat.com.
Revenue/Pay Limits
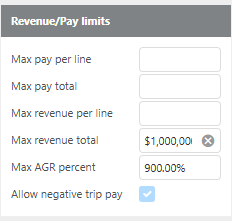
Max pay line | Enter a maximum pay line amount here. |
Max pay total | Enter a maximum pay total amount here. |
Max revenue line | Enter a maximum revenue line amount here. |
Max revenue total | Enter a maximum revenue total amount here. |
Max AGR percent | Enter a max AGR Percent. This is how much more the ADJ Revenue on the shipment can be vs the revenue. |
Allow Negative trip pay | If this box is checked, negative pay lines would be allowed on a trip. This option can only be enabled by a Ditat Representative. |
Maximum Amounts are optional for you to use or ignore. Their purpose is to avoid a payment/billing mistake through a data entry error. For example, if you set the maximum revenue total at $12,000.00 and an amount of $120,000.00 is keyed in, you will receive a validation error and be unable to save the amount.
Allow Negative trip pay. QuickBooks and other accounting software systems may not be able to receive Bills with a negative amount.
Default Report Forms
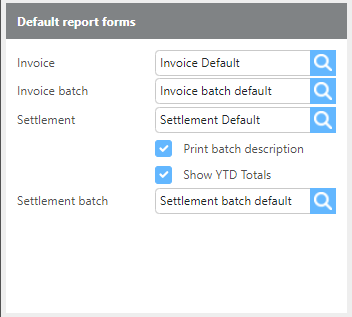
Field | Description |
Invoice | Select which invoice will be used by default for your system. This will be the invoice template that is used to create your invoices unless you select a different invoice to use on a specific customer. |
Invoice batch | Select which invoice batch will be used by default for your system. This is the Bundle cover sheet that will be used for your system. |
Settlement | Select which settlement will be used by default for your system. |
Print batch description | Check this box if you would like the description from the Settlement batch to be printed on each settlement. |
Show YTD | Check this box if you would like the Year to date totals to be printed on the top of the Settlement. |
Settlement bundle | Select the Settlement summary form that you would like to use for your system. |
Invoicing Options and Defaults
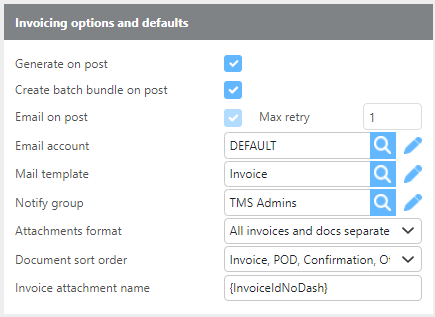
Invoice attachment name
{InvoiceId} - This option will name the invoice attachment how the invoice Id reads in the TMS.
EX) IN-0000001774-01
{InvoiceIdNoDash} - This option will name the invoice attachment as the invoice id without the dashes.
EX) IN000000177401
{InvoiceShort} - This option will name the invoice attachment without the lead ‘IN-’ and the trailing ‘-01, -02, ect..’ This option is best used when only the digits inside of the dashes are needed.
EX) 0000001774
Field | Description |
Generate on post | If this box is checked the system will Generate an Invoice and attach to the shipment when the batch is posted. |
Create batch bundle on post | If this box is checked the system will Generate an Invoice Bundle and attach to the Document management folder on the batch when the batch is posted. This is used for getting a bundle to mail to factoring companies. |
Email on post | If this box is checked the system will Email an Invoice to the customers that are set to Bill via email when the batch is posted as long as you have it set to Generate on Post. |
Max retry | The number of times the system will retry to email the invoice if there is an issue. |
Email account | Select the default Email account that system will send invoices from. This will be used for all customers unless specified on the customer's profile. |
Mail template | Select the default mail template that system will send invoices from. This will be used for all customers unless specified on the customer's profile. |
Notify group | Select the group of users that will be emailed If an emailing Invoicing error occurs. |
Attachments format | Choose how you want the attachments and docs to apply to the outgoing emails. |
Document sort order | Choose the order the system should use when applying supporting documents on bundles or for attaching to emails. |
Invoice attachment name | Enter the Tag for the naming convention to use on attachments for emails. |
Date Control
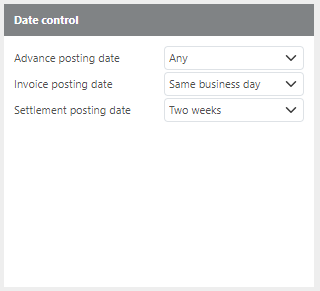
Use date control to set how far from the batch’s set date it can be posted.
Example:
Any will allow the batch to be posted any range away from the set date.
Same business day will require the batch to be posted the same day.
Two weeks will require the batch to posted withing 2 weeks (plus or minus) from the set date.
Default Document Management Folders
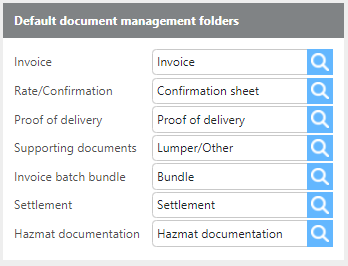
Field | Description |
Invoice | This is the folder that will be used for emailing customers Invoices. |
Rate/Confirmation | Select the folder that you will upload Confirmation sheets to, this will be the folder that is used for invoicing. |
Proof of delivery | Select the folder that you will upload proof of delivery documents to, this will be the folder that is used for invoicing. |
Supporting documents | Select the folder that you will upload supporting documents to, this will be the folder that is used for invoicing. |
Invoice batch bundle | Select the folder in which the system will add Invoice batches to, by default this needs to be the Bundle folder. |
Settlement | Select the folder in which the system will add Settlements to when posted, by default this needs to be the settlement folder. |
Hazmat documentation | Select the folder that you will upload Hazmat documents to. This will be the folder that is used to show if Hazmat Documents have been uploaded. |
Settlements Options and Defaults
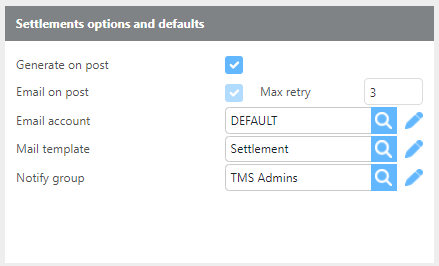
Field | Description |
Generate on post | If this box is checked the system will Generate a settlement and attach to the driver when the batch is posted. |
Email on post | If this box is checked the system will Email settlements to any drivers/carriers that are set to receive emailed settlements once the settlement batch is posted. If this is unchecked, after a settlement batch is posted, individual settlements will no longer email manually. |
Max retry | The number of times the system will retry to email the settlement if there is an issue. |
Mail template | Select the default mail template that the system will send invoices from. |
Notify group | Select the group of users that will be emailed If an emailing settlements error occurs. |
Advance Processing Rules
The goal of this feature is to automatically adjust advance amounts upon importing based on these preset rules.
Click here for information on how to set up advance processing rules.

