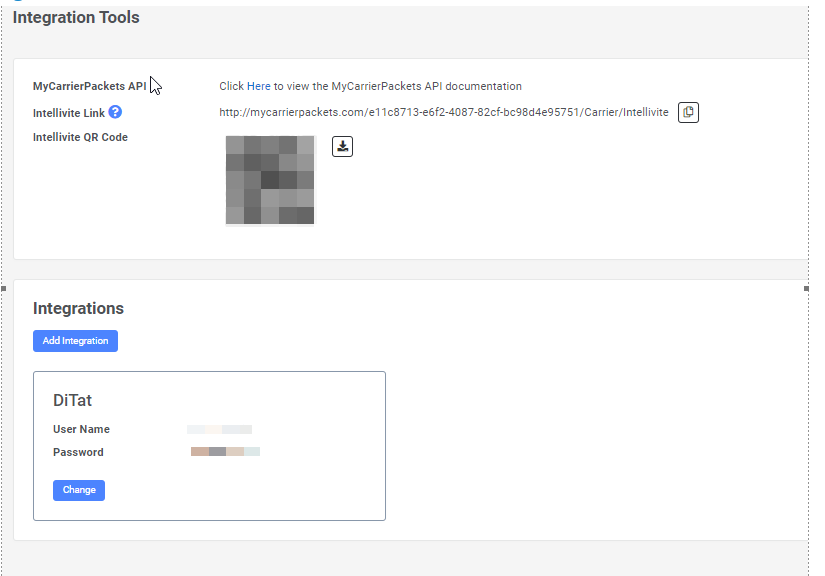
Account Settings
|
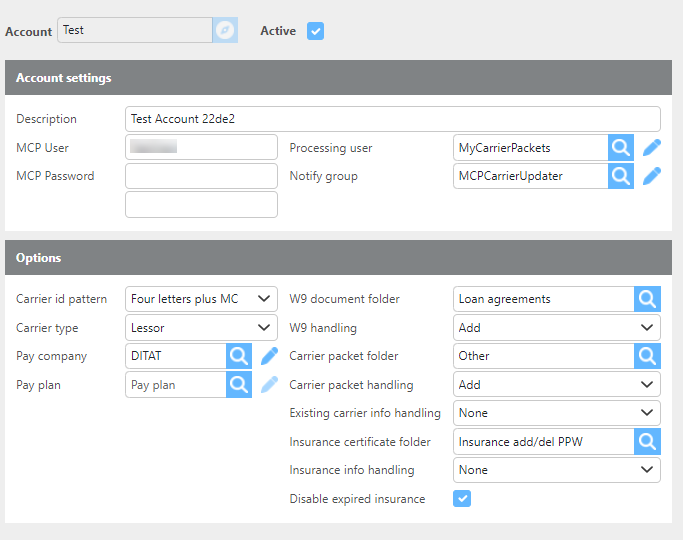
Field |
Description |
|
Account Settings |
|
|
Account Id |
Here enter the account id. Click here for information on how to use the record Id field. |
|
Description |
Enter a description for this account. |
|
MCP User |
Enter the Integration user here. |
|
Processing user |
Enter the Ditat user that should be used to enter the data. |
|
MCP Password |
Enter the integration's user password here |
|
Notify group |
Select which Ditat user group should receive MCP notifications. |
|
Options |
|
|
Carrier Id pattern |
Select the format that should be used when creating the carrier Id. |
|
W9 document folder |
Select which document management folder the W9 should be applied to. |
|
Carrier type |
Choose if carriers should be added as a Carrier or Lessor. (Carrier would be for brokerage, Lessor for owner-operators) |
|
W9 handling |
Select how the W9 should be handled. |
|
Pay company |
Select which of your companies will be the pay company. |
|
Pay plan |
Specify a pay plan here if you would like new carriers to be set up with this pay plan attached. |
|
Carrier packet folder |
Select which document management folder the carrier packet document should be applied to. |
|
Carrier packet handling |
Select how the carrier packet should be handled. |
|
Existing carrier info handling |
Select how the existing carrier information should be handled. |
|
Insurance info handling |
Select how insurance information should be handled. |
MCP Button Functionality
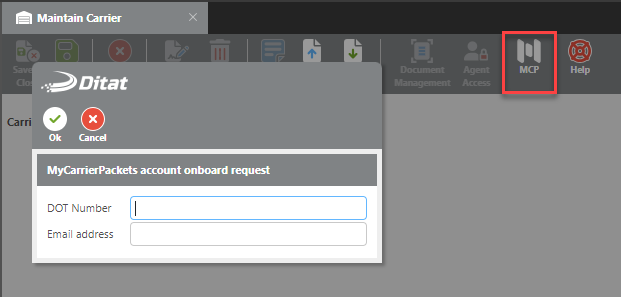
This button works as a carrier invitation. This will send a carrier packet to be filled out; once completed and accepted in MCP, the carrier will be created.
|
Field |
Description |
|
MCP Account |
Select which MCP import settings should be used. |
|
DOT Number |
Enter the DOT number for the carrier you want to invite. |
|
Email address |
Enter the email address for the carrier you want to invite. |
|
Disable expired insurance |
Check the box to have the system disable expired insurance policies. |
My Carrier Packet user
The user must be created in the MCP portal by the account admin.
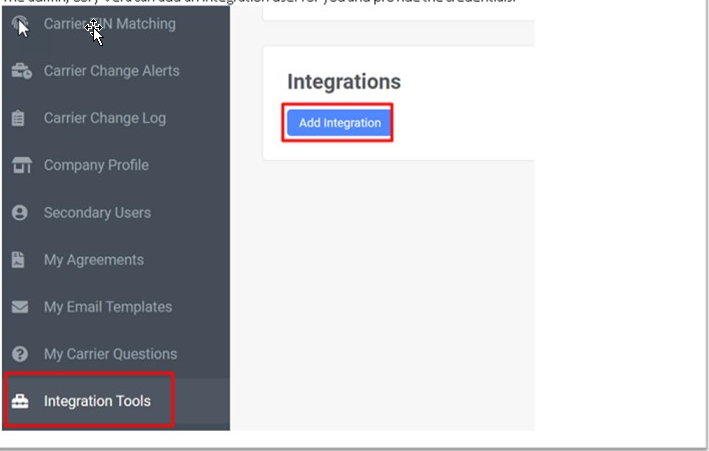
Once you add the integration you will get a screen like the one below where you can add the User name and password that needs to be entered into Ditat.